Video Tools

VN Video Editor

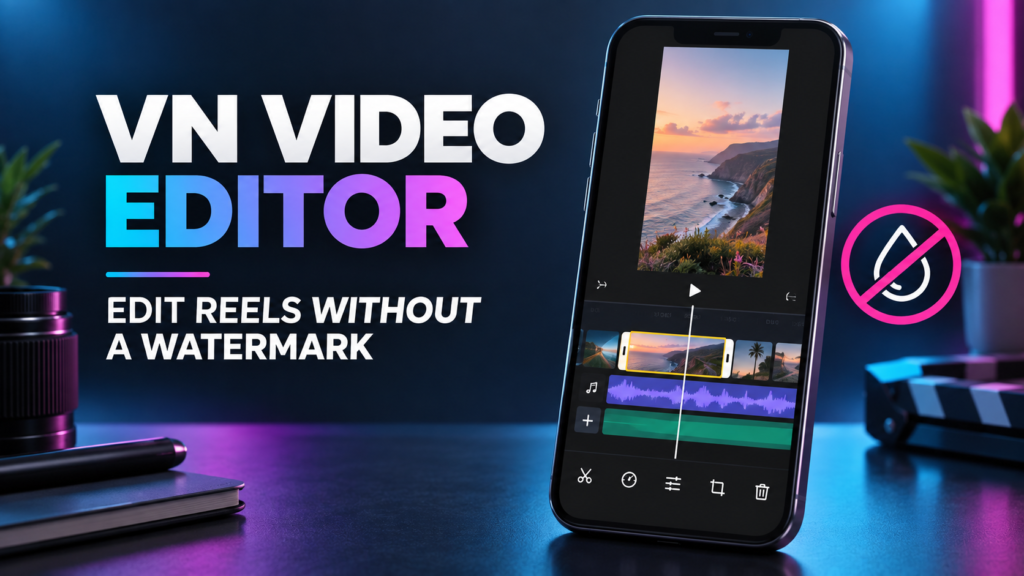
VN Video Editor: How to Edit Reels Without a Watermark

Creating an attractive Instagram Reel does not require expensive desktop software. A phone, a clear idea and a capable mobile editor are enough for many short videos. VN Video Editor is useful for this purpose because it combines a multi-track timeline with trimming, music, captions, speed controls, transitions, filters and high-quality export.

One of its biggest attractions is watermark-free editing. VN’s official website currently describes the editor as free with no watermarks, and its Apple App Store listing also calls it a professional editor that is free with no watermark. This means a normal project can be exported without a permanent VN logo stamped over the video.

However, a clean export still depends on what you add to the timeline. A downloaded template may contain a creator’s ending card, text or logo as an editable element. A source video may already have another platform’s watermark burned into it. These are different from a watermark automatically added by VN.

This guide explains how to create a Reel from the beginning, edit it cleanly, select practical export settings and upload it to Instagram without an unnecessary editor watermark.

Quick answer: Open VN, tap New Project, import your clips, set the canvas to 9:16, trim and arrange the footage, add audio and captions, and export at 1080 × 1920 and 30 FPS. A standard VN project should export without a permanent VN watermark. Preview the entire file before uploading and delete any optional template outro from the timeline when you have the right to remove it.

Table of Contents

What Is VN Video Editor?

VN is a mobile video and photo editor developed by Ubiquiti Labs. It is available through the official VN website, Google Play and the Apple App Store.

The editor is designed for both quick social videos and more controlled timeline editing. According to its current official listings, VN includes:

  1. A multi-track timeline for video, audio, images, text and overlays
  2. Frame-accurate trimming and splitting
  3. Music, sound effects and recorded voice-overs
  4. Automatic captions and caption styles
  5. Text-to-speech tools
  6. Filters and support for LUT-based color looks
  7. Transitions and motion effects
  8. Keyframe animation
  9. Normal and curve-based speed control
  10. Beat markers for music synchronization
  11. Background cutout and masking tools
  12. AutoCut and beat-synced templates
  13. Export at up to 4K and 60 FPS on supported devices

Not every creator needs every feature. For an ordinary Instagram Reel, the most important tools are the 9:16 canvas, trim and split controls, audio timeline, captions, text, basic color adjustments and export panel.

Does VN Video Editor Really Export Without a Watermark?

Yes, VN currently advertises watermark-free editing. Its official website states that it provides editing with no watermarks, and the current iOS listing explicitly says the app is free with no watermark.

That does not mean every file opened in VN is automatically free of all branding. It helps to understand four different situations.

A normal project created from your own clips

When you start a new manual project and use your own footage, VN should not place a permanent app logo across the exported video.

A template with an editable ending card

Some templates can include a final card, username, logo or credit as an ordinary timeline element. If that item is optional and you have permission to alter the template, select it and delete it before export. Watch the final seconds carefully because short outro clips are easy to miss.

A watermark already inside the source footage

If a clip was downloaded from another social platform, its logo or username may already be part of the pixels. VN did not add it. Use the original camera file whenever possible instead of repeatedly downloading and reposting compressed social-media copies.

Do not remove ownership marks from content that you do not own or have permission to edit.

Premium assets or AI features

VN is free to download and includes in-app purchases. Some assets, AI functions or usage allowances may require a paid option or credits. A paid feature notice is not the same as an automatic export watermark. Availability can also vary by device, platform, region and app version.

Why VN Works Well for Instagram Reels

Instagram’s built-in editor is convenient for quick posts, but VN gives you more control before upload. You can zoom into a timeline, make precise cuts, keep multiple audio and overlay layers visible, save a draft and return to it later.

VN is particularly useful when you want to:

  1. Combine several short clips into one Reel
  2. Cut footage exactly on music beats
  3. Create talking-head videos with automatic subtitles
  4. Make a photo Reel with movement and transitions
  5. Add product close-ups, prices or call-to-action text
  6. Use overlays, masks or keyframes
  7. Export one clean master file for Instagram and other platforms

For creators in India and other mobile-first markets, another advantage is that editing can be completed on Android or iPhone without relying on a desktop computer.

What You Need Before Starting

Prepare the following items before opening a new project:

  1. The original video clips or photographs
  2. A one-sentence goal for the Reel
  3. A short hook for the first screen
  4. Any voice-over or spoken script
  5. Music or a plan to add licensed Instagram audio later
  6. Brand colors, fonts or a logo if relevant
  7. Enough free phone storage for source files and the export

A simple plan saves more time than adding random effects. Decide whether the Reel should teach, entertain, demonstrate, compare or sell. Then choose only the clips that support that purpose.

Plan the Reel Before You Edit

Start with one clear message

A short Reel becomes confusing when it tries to explain several unrelated ideas. Use one promise, such as:

  • Three ways to improve a phone photo
  • A 20-second recipe
  • One before-and-after transformation
  • A quick product demonstration
  • A single travel moment

Write the hook first

The opening should tell viewers why they should continue. A useful hook can be a question, result, problem or surprising statement.

Examples include:

  • Your Reel looks blurry because of this setting.
  • Try this before paying for another editing app.
  • Three mistakes making your product videos look cheap.
  • Here is the final result. Now let me show you how I made it.

Keep opening text short enough to read quickly on a phone.

Choose vertical footage

Record vertically whenever the final destination is Instagram Reels. Vertical footage fills the 9:16 screen without large blank areas or aggressive cropping. If you must use horizontal footage, leave enough room around the subject so it can be reframed.

Record clean source video

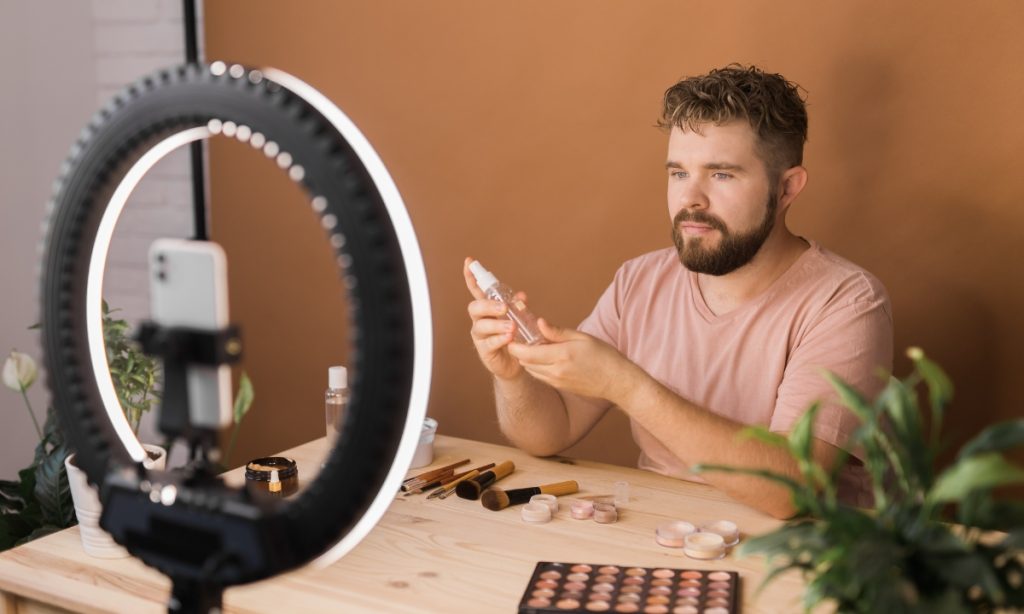
Good editing cannot completely repair poor capture. Clean the camera lens, use stable light, keep the phone steady and record at the best practical quality. Avoid digital zoom when you can move physically closer.

Best VN Project Settings for Instagram Reels

The following settings are a reliable starting point rather than a guarantee that every Reel needs identical values.

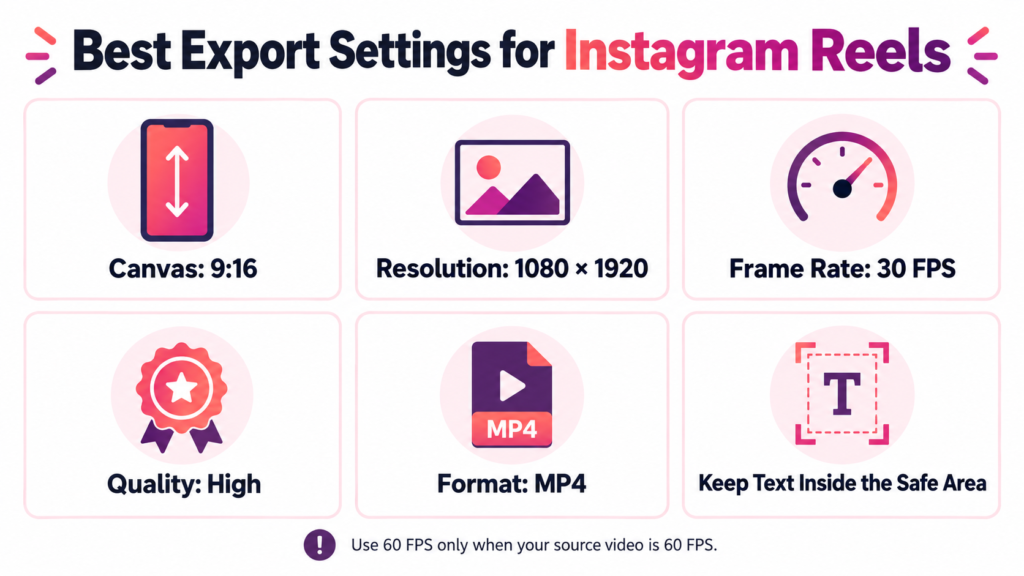
SettingRecommended starting pointWhy it helps
Canvas ratio9:16Fills a vertical mobile screen
Export resolution1080 × 1920Clear Full HD output without an unnecessarily large 4K file
Frame rate30 FPSSuitable for most ordinary Reels
Alternative frame rate60 FPSUse when important source footage was recorded at 60 FPS and smoother motion matters
BitrateHigh or AutoPreserves detail better than an aggressive low setting
AudioOnKeeps music, speech and effects in the export
OrientationPortraitMatches the Reel format

VN can export at higher resolutions on supported devices, but exporting a 4K project does not turn low-resolution source footage into true 4K detail. A clean 1080 × 1920 export is usually the more practical choice for Instagram.

A reliable starting point for vertical Reel exports. Match the frame rate to the source when motion quality matters.
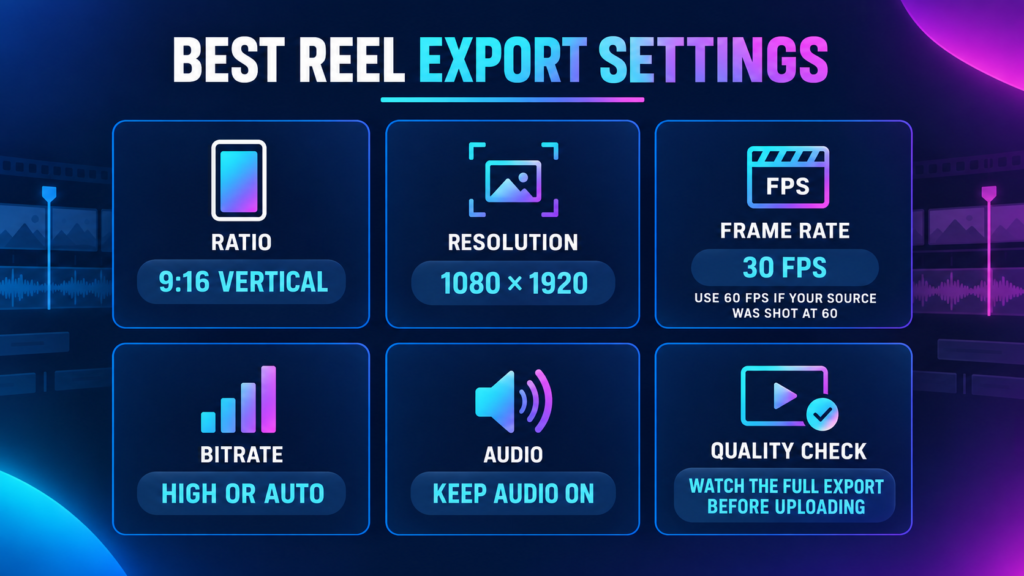
Best VN Reel export settings

How to Edit Reels in VN Video Editor: Complete Tutorial

Button positions and labels may move slightly after an app update, but the main workflow remains similar on Android and iPhone.

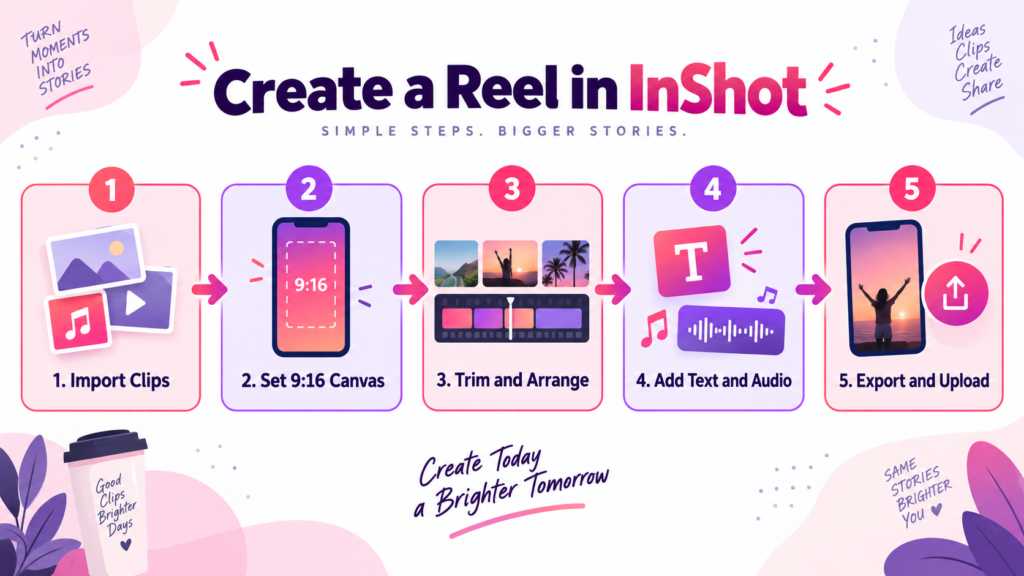
The complete VN Reel workflow: create, format, trim, add audio, add captions, and check the export.

Step 1: Install the official VN app

Download VN from the official website or your device’s official app store. On Android, verify that the listing is VN: Photo & Video Editor by Ubiquiti Labs, LLC. Avoid modified APK files and unofficial download pages. They may be outdated or unsafe, and you do not need a modified app to obtain a normal watermark-free VN export.

Open the app and grant only the permissions required to select and save media. Access prompts can look different depending on the version of Android or iOS.

Step 2: Tap New Project

From the home screen, choose New Project or the plus button. VN may also show template and automatic editing choices. Select a manual project when you want full control over cuts, audio and text.

Step 3: Import your best clips

Select videos and photographs from the device. Import them in the approximate order you want them to appear. You can rearrange the timeline later.

Do not import every take simply because it exists. Too much unused footage can make a project slower and harder to manage. Keep the strongest versions and retain original files outside the app until the Reel is published successfully.

Step 4: Set the canvas to 9:16

Find the canvas, ratio or crop control and select 9:16. This creates a vertical frame suitable for a full-screen Reel.

Review every clip after changing the ratio. VN may fill the frame by cropping the sides of horizontal footage. Pinch or drag to reposition each clip so the main subject remains visible.

If cropping would remove important content, use a blurred or colored background rather than stretching the video. Stretching distorts faces and objects.

Step 5: Arrange clips in story order

Drag clips left or right on the timeline. A useful basic order is:

  1. Hook
  2. Context
  3. Main value or transformation
  4. Result
  5. Call to action

For a tutorial, show the final result near the beginning and then explain the process. For a product Reel, show the product in use before adding specifications.

Step 6: Trim unwanted footage

Select a clip and drag its beginning or ending edge inward. Remove camera shakes, long pauses, repeated words and moments before the action begins.

Make the first cut especially strict. Viewers should not wait through two seconds of someone reaching for the record button.

Step 7: Split clips for precise cuts

Move the playhead to the exact frame where a new shot, beat or sentence should begin. Select the clip and tap Split. Delete the unwanted section or move the separated part.

Splitting is useful for:

  • Removing a mistake from the middle of a talking clip
  • Changing camera angles
  • Cutting on a music beat
  • Applying an effect to only one section
  • Creating a jump cut that removes silence

Zoom into the timeline when you need a more accurate cut.

Step 8: Crop and reframe each shot

Check headroom, eye position and the direction in which the subject faces. Keep faces away from extreme edges. For demonstrations, make the important action large enough to understand on a small screen.

Avoid placing essential visual details at the very bottom or far right of the frame because Instagram’s interface can cover those areas with captions and controls.

Step 9: Add transitions carefully

Tap the transition marker between two clips and choose an effect. A short dissolve, fade, blur or movement transition can connect related shots.

Not every cut needs a transition. Direct cuts often look cleaner and faster. Use a transition when it supports a change in place, time or idea. Applying a different dramatic transition after every clip can make the Reel feel less professional.

Step 10: Adjust speed

Use normal speed control to make a clip uniformly faster or slower. Use curve speed when you want a speed ramp, such as normal motion moving into slow motion and then accelerating again.

For smooth slow motion, begin with footage recorded at a higher frame rate when possible. VN also lists smooth slow motion among its smart tools, but processing quality depends on the source and device.

Always check speech after changing speed. Speeding up dialogue can make a voice difficult to understand.

Step 11: Add music or original audio

Open the music or audio section. Depending on your project and device, you may be able to use VN’s available tracks, import permitted audio, extract audio from a video or record a voice-over.

Balance the levels rather than simply turning every track to maximum volume. Speech should remain easy to hear. Lower background music under dialogue and use fades to prevent an abrupt beginning or ending.

For commercial or sponsored content, confirm that you have permission to use the music. A track available in one editor is not automatically cleared for every commercial use or platform. Another safe workflow is to export the video with speech and sound effects, then add licensed audio from Instagram’s own music library during upload.

Step 12: Synchronize cuts to the beat

VN offers beat tools and markers. Play the music, add markers at important beats, then align clip changes with those points.

Do not cut at every beat if it makes the story difficult to follow. Strong beats, chorus changes and transitions in the music are usually better editing points than every small sound.

Step 13: Add a voice-over

Move the playhead to the desired starting point and choose the recording or voice-over tool. Record in a quiet room and keep the phone microphone at a consistent distance.

Record short sections when a long narration is difficult. Short segments are easier to replace without repeating the entire voice-over.

Step 14: Generate automatic captions

Select the automatic caption tool and choose the correct source audio and language if prompted. VN’s current official listings say auto captions support multiple languages, templates and animated styles.

Automatic captions save time, but they are not guaranteed to be perfect. Review every line. Correct names, numbers, technical terms and regional words. Shorten captions that remain on screen too briefly.

Step 15: Style captions for mobile viewing

Use a simple font with clear contrast. White text with a dark shadow or background box is usually easier to read than thin decorative lettering.

Keep captions within a central safe area. Avoid the bottom edge, where Instagram places the username and caption, and avoid the right side, where action icons can appear. Split long sentences into short lines instead of shrinking the font.

Step 16: Add hook text and a call to action

Use a separate text layer for the opening hook. Keep it visible long enough to read. The final screen can contain one simple action, such as:

  • Save this guide
  • Follow for more editing tips
  • Which version looks better?
  • Try this setting on your next Reel

Avoid placing several calls to action on the same screen.

Use overlay layers for a screenshot, product detail, logo, arrow or supporting clip. Resize and position the item inside the safe area.

Keyframes can animate an overlay from one position or scale to another. For example, add one keyframe at the beginning, move forward on the timeline, enlarge the image and add another keyframe. VN calculates the movement between those points.

Keep logos small enough that they do not distract from the content. Your own brand mark is not the same as an unwanted editor watermark.

Step 18: Correct color and apply filters

Start with basic adjustments such as exposure, contrast, highlights, shadows, temperature and saturation. Try to make clips from different cameras or lighting conditions feel consistent.

Apply filters with restraint. A filter should support the mood without making skin tones unnatural or removing detail. VN also supports LUT-based looks, but a LUT is not a one-click replacement for correcting badly exposed footage.

Step 19: Review the entire timeline

Watch the Reel from beginning to end without stopping. Check:

  1. Whether the opening is immediate and clear
  2. Whether any clip lasts longer than necessary
  3. Whether captions match the spoken words
  4. Whether music covers the voice
  5. Whether text remains inside safe areas
  6. Whether transitions flash or stutter
  7. Whether any blank frame appears between clips
  8. Whether a template outro remains at the end
  9. Whether the final call to action stays visible long enough

Use headphones for one review and the phone speaker for another. Many people will watch using a small speaker or with the sound turned off, which is why readable captions matter.

Step 20: Remove an optional template outro

Move the playhead to the final seconds. If you see a separate VN card, template credit, creator username or blank ending clip, select that element in the timeline.

Delete it only if it is an editable project element and you have permission to alter it. This is not a hack or a bypass. It is ordinary timeline cleanup. If branding is baked into third-party footage, replace the source with an authorized original rather than hiding someone else’s ownership mark.

Step 21: Export the Reel

Tap the export icon. For most Reels, begin with:

  • Resolution: 1080p or 1080 × 1920
  • Frame rate: 30 FPS
  • Bitrate: High or Auto
  • Audio: Enabled

Use 60 FPS when your source was recorded at 60 FPS and the smoother motion is important. Do not automatically convert 30 FPS footage to 60 FPS because extra frames do not restore missing motion detail.

Tap export and keep VN open until processing finishes. Long, high-resolution projects with many effects can take more time and battery.

Step 22: Inspect the exported file

Open the saved video in the phone gallery before uploading. Watch the first and last seconds and inspect text, motion and audio synchronization.

Confirm that:

  • The video fills the vertical frame
  • No unwanted ending card appears
  • Captions are readable
  • Speech is clear
  • The video is not black, frozen or cropped incorrectly
  • The export has no visible VN watermark

Keep the VN project until the post is live and checked. If Instagram crops text or the audio balance feels different after upload, you can return to the project and make a corrected version.

Step 23: Upload to Instagram

Open Instagram, create a Reel and select the exported video. Choose a cover image, write a useful caption and add relevant on-screen or caption keywords naturally.

If you plan to use audio from Instagram’s licensed library, add it during this stage and lower or mute any temporary guide track from the edit. Review the audio balance before publishing.

Instagram’s interface and Reel requirements can change, so check the platform’s current Reels help information when a file is rejected.
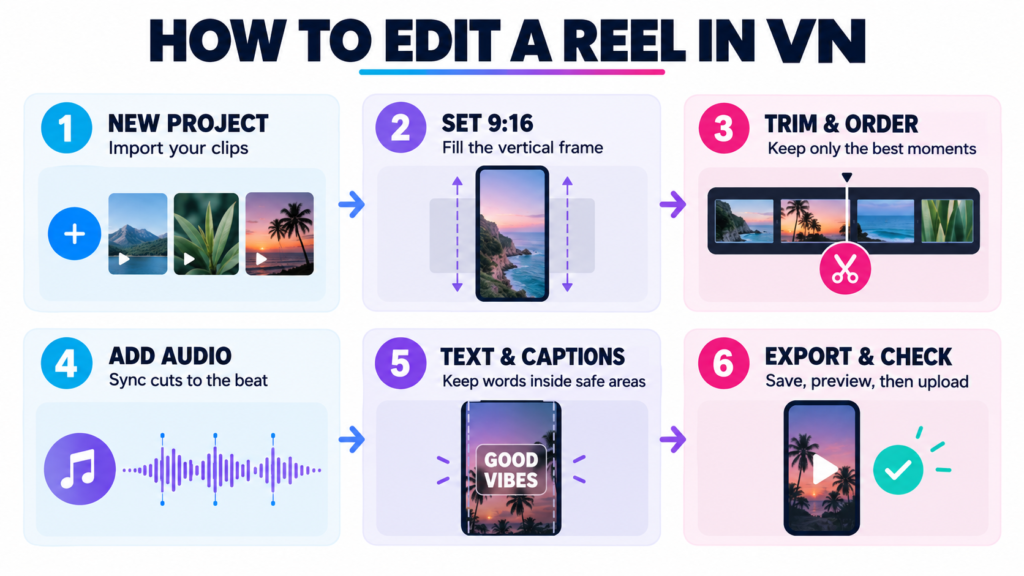
How to edit a Reel in VN

How to Make a Beat-Synced Reel in VN

Beat-synced edits work well for fashion, travel, food, event and transformation videos.

  1. Start a new 9:16 project.
  2. Add the selected music or a permitted guide track.
  3. Open the beat tool and place markers on strong beats.
  4. Import clips with varied framing, such as wide, medium and close shots.
  5. Split or trim clips so important visual changes meet the markers.
  6. Use direct cuts for most beats.
  7. Add one or two transitions at larger changes in the music.
  8. Preview twice to check timing.
  9. Export a clean version and add platform audio if licensing requires it.

The goal is visual rhythm, not the greatest possible number of cuts.

How to Create a Talking-Head Reel

For an educational or commentary Reel, clarity is more important than visual effects.

  1. Import the main speaking clip.
  2. Remove pauses, mistakes and repeated sentences with split and delete.
  3. Add jump cuts where necessary.
  4. Insert B-roll or screenshots as overlays to illustrate key points.
  5. Generate automatic captions.
  6. Correct every caption manually.
  7. Add a short title hook near the beginning.
  8. Lower background music so speech remains dominant.
  9. Use only subtle zoom keyframes when emphasis is needed.
  10. End with one clear takeaway or call to action.

Do not overcut natural speech. A Reel should feel energetic without making the speaker difficult to follow.

How to Make a Photo Reel in VN

VN can turn a group of photographs into a vertical slideshow.

  1. Create a new project and import the photos in story order.
  2. Set the canvas to 9:16.
  3. Adjust how long each image remains visible.
  4. Reframe each photo so faces and important objects are not cropped.
  5. Add gentle zoom or pan movement with keyframes.
  6. Use one consistent family of transitions.
  7. Add music and align image changes with major beats.
  8. Add short captions when context is needed.
  9. Export at 1080 × 1920.

If a source image is blurry, improve it before placing it in the Reel. Digital Discite’s Picsart AI Image Enhancer guide explains one way to prepare low-quality photographs.

How to Create a Product or Business Reel

A product Reel should show usefulness rather than only displaying a logo.

Use this structure:

  1. Problem: Show what the customer struggles with.
  2. Product in action: Demonstrate how it helps.
  3. Detail: Use close-ups for texture, controls or results.
  4. Proof: Show a before-and-after view, process or realistic outcome.
  5. Next step: Tell viewers where to learn more.

Keep prices and claims accurate. Do not use misleading before-and-after footage, fabricated reviews or an exaggerated result that the product cannot normally deliver.

How to Keep Text Inside the Reel Safe Area

The 9:16 canvas is not completely free space. Instagram can place interface elements over parts of the video. The exact overlay may vary by device and screen.

Use these practical rules:

  • Keep the hook away from the extreme top edge.
  • Keep captions above the bottom username and description area.
  • Keep essential text away from the right-side action buttons.
  • Preview the exported video on a phone at normal size.
  • Upload a private test or draft when placement is critical.

Do not solve safe-area problems by making every word tiny. Shorten the text and use multiple caption screens instead.

How to Export Without Losing Noticeable Quality

Use original source files

Every download and re-upload can add compression. Edit camera originals when possible.

Match the frame rate

Export 30 FPS footage at 30 FPS. Use 60 FPS when the original was recorded at 60 and smoother movement is useful. Converting a low-frame-rate source to a higher number does not automatically improve it.

Avoid unnecessary 4K export

VN supports up to 4K at 60 FPS on supported devices, according to its official app listings. However, 1080 × 1920 is normally sufficient for a vertical Instagram Reel. A 4K export takes more space and processing time, and Instagram may compress it again.

Select a reasonable bitrate

A very low bitrate can create blocky motion and smudged detail. High or Auto is a suitable starting point if storage and upload speed are not severe constraints.

Do not repeatedly export and re-edit

Return to the original VN project for changes. Editing an already compressed export and saving it again can reduce quality further.

Enable high-quality uploads in Instagram

Instagram may offer an Upload at highest quality setting under media-quality or data-usage preferences. The name and location can change. Enable it when available, especially if you regularly upload on a stable connection.

Watermark-free does not mean copyright-free. The app logo and music rights are separate issues.

Before publishing, make sure you own the audio, have a suitable license, or are using music made available for the relevant use through Instagram. Business accounts can have different music availability from personal or creator accounts.

Avoid downloading a trending song from an unrelated website and adding it as if it were royalty-free. A video can be muted, blocked or limited even when the visual export contains no editor watermark.

For branded campaigns, keep records of licenses and confirm whether paid advertising is covered.

VN Free vs Paid Features

VN is free to download, advertises no-watermark editing and offers in-app purchases. The exact mix of free assets, AI credits, storage or subscription benefits can change.

For a basic Reel, the free core workflow is usually the relevant part: import, arrange, trim, split, add text or audio and export. If VN places a payment icon or usage notice on a particular asset, decide whether to replace it with a free option or purchase access through the official app.

Do not install a modified APK to unlock paid features. It can expose your device or media and may violate the app’s terms.

Common VN Video Editor Problems and Solutions

VN adds an ending clip

Inspect the final timeline. If the ending is a separate editable template element, select and delete it when permitted. If it belongs to the original source file, obtain a clean authorized source.

The export has a watermark even though VN says it is watermark-free

Identify where the mark appears. It may be part of an imported template, sticker, creator overlay or source clip rather than a VN export mark. Disable timeline layers one at a time to locate it.

The video does not fill the Reel screen

Set the canvas to 9:16, then reframe every clip. Use a blur background for horizontal media if cropping would remove essential content.

The Reel looks blurry after upload

Export at 1080 × 1920 with a suitable bitrate, use original footage, avoid repeated compression and enable Instagram’s highest-quality upload option when available. A poor source cannot be fully repaired simply by selecting 4K export.

Captions are covered by Instagram buttons

Move text toward the center and upward. Keep critical words away from the bottom and right edges.

Music is louder than the voice

Select the music layer and reduce its volume. Add fade-in and fade-out. Test using both headphones and the phone speaker.

Audio and video are out of sync

Close background apps, restart the project preview and inspect the exported file rather than relying only on playback inside the editor. If the problem remains, try matching the project frame rate to the source and remove a problematic clip or effect.

VN freezes or becomes slow

Save the draft, close unnecessary apps and free device storage. Very long projects, 4K clips, many overlays and heavy effects require more memory. Divide a complicated edit into shorter sections if necessary.

Export fails

Check storage space, battery level and app permissions. Try a 1080p export instead of 4K, remove a recently added asset, restart the app and update through the official store. Keep a copy of original media before clearing app data or reinstalling.

A font or effect is missing when the project reopens

The asset may not have downloaded fully or may no longer be available. Replace it with a local or available asset and preview the full project before the final export.

Instagram rejects the file

Confirm that the export plays normally in the gallery, uses a vertical format and is not damaged. Re-export at 1080p and 30 FPS if a high-resolution or unusual setting causes trouble. Check Instagram’s current help information because supported limits can change.

Privacy and Safety Considerations

Video editors need access to personal media. Download VN only from an official source and review the current privacy information before granting broad access.

Google Play’s data-safety section currently says the developer may collect several data types, including personal information and photos and videos; it also says data is encrypted in transit and users can request deletion. These declarations can change, so read the current listing for your region.

Avoid importing confidential workplace recordings, private identity documents or footage of children unless you understand the app’s permissions and have the necessary consent. Do not share a VN project or template containing personal media accidentally.

Advantages of VN Video Editor

  1. Standard editing is advertised without a permanent watermark.
  2. The multi-track timeline provides more control than many quick editors.
  3. It includes precise trim, split, overlay, audio and keyframe tools.
  4. Auto captions can speed up talking-head edits.
  5. Beat markers and speed curves support more dynamic Reels.
  6. It works for video, photo, tutorial and product formats.
  7. High-resolution and high-frame-rate export are available on supported devices.
  8. Drafts can be saved for later editing.

Limitations to Consider

  1. New users may need time to understand the multi-track timeline.
  2. Some assets or AI functions may involve purchases or usage limits.
  3. Long projects with many layers can be demanding on older phones.
  4. Auto captions still require manual proofreading.
  5. Music availability does not automatically grant rights for every use.
  6. Exporting at 4K does not repair low-quality footage.
  7. Interface labels and feature availability can change with updates.

VN Video Editor vs InShot for Reels

Both apps can create vertical social videos, but their editing styles are different.

AreaVN Video EditorInShot
Timeline approachMore layered and timeline-focusedOften simpler for quick mobile edits
Watermark positioningVN currently advertises no-watermark editingFree-plan watermark behavior and removal options should be checked in the current app
PrecisionStrong trim, keyframe, beat and multi-track controlsConvenient for fast crop, trim, filters and social formats
Learning curveSlightly more involvedOften easier for a first quick edit
Best forCreators wanting more timeline controlCreators prioritizing speed and simplicity

Choose the app whose workflow helps you publish consistently. If you prefer a faster interface, read Digital Discite’s companion guide: InShot Video Editor: How to Create Instagram Reels. Add its final published URL here before posting this article.

You can also explore more platforms in Digital Discite’s Best Tech Tools section.

Frequently Asked Questions

Is VN Video Editor free?

VN is free to download and includes in-app purchases. Many core editing functions are available without payment, but specific assets, AI tools or allowances may have separate conditions.

Does VN Video Editor add a watermark?

VN currently advertises professional editing with no watermarks. A normal manual project should export without a permanent VN logo. An imported template or source clip can still contain its own branding.

How do I remove the VN ending from a Reel?

Go to the final seconds of the timeline. If the ending is a separate editable clip or template element, select it and delete it when you have permission to do so. VN’s standard export itself is currently promoted as watermark-free.

Can I use VN to edit Instagram Reels?

Yes. VN includes a vertical canvas, multi-track timeline, captions, music, text, transitions, filters and high-quality export suitable for preparing Reels.

What ratio should I use for Instagram Reels?

Use 9:16 for a full-screen vertical Reel. Review every horizontal clip after applying the ratio so important content is not cropped.

What resolution should I export from VN?

1080 × 1920 is a practical starting point for Instagram Reels. Although VN supports higher export resolutions on supported devices, 4K is not necessary for most social uploads.

Should I export at 30 FPS or 60 FPS?

Use 30 FPS for most ordinary Reels. Use 60 FPS when the source was recorded at 60 FPS and smooth motion is important. Matching the source usually prevents unnecessary conversion.

Can VN create automatic captions?

Yes. VN’s official listings include automatic captions with support for multiple languages and caption styles. Always proofread the result before export.

You can edit with audio you are authorized to use, but music rights vary. A common approach is to edit visuals in VN and add licensed trending audio inside Instagram during upload.

Why is my VN Reel blurry?

The source may be low resolution, the export bitrate may be too low or Instagram may have compressed the upload. Use original files, export at 1080 × 1920 with High or Auto bitrate and avoid repeated re-exports.

Can VN export in 4K?

VN’s current official app listings say it can export at up to 4K and 60 FPS on supported devices. Available performance depends on the device, source files and app version.

Is VN safe to download?

Use the official website, Google Play or Apple App Store. Review permissions and the latest privacy declarations, and avoid unofficial modified APK files.

Can I edit a photo Reel in VN?

Yes. Import photographs, set a 9:16 canvas, adjust their duration, add keyframe movement, transitions, captions and music, then export the slideshow as a video.

Can I use VN for YouTube Shorts and TikTok too?

Yes. VN’s official listings describe support for Instagram Reels, TikTok and YouTube Shorts. Create a clean master export, then check each platform’s current size, length, music and upload rules.

Final Verdict

VN Video Editor is a strong option for creators who want more timeline control than a basic social editor without accepting a permanent app watermark on a standard export. Its trimming, multi-layer timeline, music controls, captions, transitions, keyframes and high-quality export tools are sufficient for many professional-looking Instagram Reels.

The best workflow is simple: start with original vertical footage, set the project to 9:16, remove weak moments, keep text inside safe areas, balance the audio and export at 1080 × 1920. Check the entire saved file before uploading, especially the first and final seconds.

VN can help create a clean file, but successful Reels still depend on a clear idea, useful content, strong opening and responsible use of music and third-party media.

Disclosure: Digital Discite is not affiliated with VN, Ubiquiti Labs or Instagram. Product names and trademarks belong to their respective owners. Features, limits and interface labels may change after publication.

VN Video Editor: How to Edit Reels Without a Watermark Read More »
InShot Video Editor

InShot Video Editor: How to Create Instagram Reels

Instagram Reels can look polished without an expensive camera or a desktop editing program. With InShot Video Editor, you can arrange clips, remove unwanted sections, add text, record a voice-over, adjust speed, insert transitions, and prepare a vertical video directly on your phone.

The key is not to use every effect in the app. A strong Reel needs a clear opening, clean cuts, readable captions, balanced audio, and the right export settings. This guide walks through the entire process, from planning the video to publishing it on Instagram.

InShot is available for Android and Apple devices. Its current store listings describe tools such as trimming, merging, speed control, keyframes, picture-in-picture, chroma key, auto captions, background removal, voice-over recording, and exports up to 4K at 60 frames per second. The official InShot website, Google Play listing, and Apple App Store listing provide the latest feature and compatibility details.

Quick answer: Open InShot, tap Video, create a new project, import your clips, set the canvas to 9:16, trim and arrange the footage, add text and audio, and export at 1080 × 1920 and 30 FPS. Then upload the finished file as an Instagram Reel and enable Instagram’s highest-quality upload option.

Table of Contents

What Is InShot Video Editor?

InShot is a mobile video and photo editing app. It is designed for quick, touch-based editing, so it suits people who create content without a computer. You can use it for Instagram Reels, YouTube Shorts, WhatsApp Status videos, product demonstrations, travel clips, tutorials, and photo slideshows.

The editing timeline is simple enough for a beginner, but the app also includes more advanced tools. Depending on your device, app version, and plan, you may see:

  • Trim, split, crop, rotate, and merge tools
  • Canvas and aspect-ratio controls
  • Music, sound effects, extracted audio, and voice-over recording
  • Text, stickers, and automatic captions
  • Filters, colour adjustments, effects, and transitions
  • Speed controls and speed curves
  • Picture-in-picture layers
  • Keyframe animation
  • Chroma key and background removal
  • Object tracking and video stabilisation
  • Custom export resolution and frame rate

That combination makes InShot useful for fast social media editing. It also keeps the whole workflow on one device. You can record, edit, export, and upload without moving large files to a laptop.

Is InShot connected to Instagram?

No. InShot is a separate editing app. Its official app listing says it is not affiliated with or endorsed by Instagram or Meta. You create the video in InShot, save it to your device, and then publish it through Instagram.

What You Need Before Creating a Reel

A few minutes of preparation can save much more time during editing.

1. A simple idea

Write the Reel’s purpose in one sentence. For example:

  • Show three features of a new phone accessory.
  • Explain one useful Excel shortcut.
  • Share a before-and-after room makeover.
  • Turn five travel clips into a short montage.
  • Answer one common customer question.

If the idea cannot be stated clearly, the video may contain too many messages.

2. A hook

The first moment should tell viewers why they should continue. Start with the result, a question, a surprising detail, or a clear promise.

Examples include:

  • “Your Reels look blurry because of this setting.”
  • “Here is the fastest way to clean up a product video.”
  • “Three editing mistakes new creators make.”
  • “Watch this plain clip become a polished Reel.”

Avoid a long logo animation or a slow introduction. The viewer should understand the subject immediately.

3. Vertical source clips

Record vertically whenever possible. A vertical clip fills a Reel’s screen and needs less cropping. Clean the camera lens, use good light, keep the phone steady, and record a few seconds before and after the main action. Those extra seconds give you room to trim.

4. A basic shot list

A short tutorial may need only five shots:

  1. The result or hook
  2. The starting point
  3. The first action
  4. The second action
  5. The finished result and call to action

Shoot close-ups as well as wider views. The change in framing gives you natural visual variety.

5. Enough storage and battery

Video projects can consume several gigabytes. Keep space available for source clips, preview files, and the final export. Save important original footage somewhere safe before making major edits.

Best InShot Settings for Instagram Reels

Use these settings as a reliable starting point. They preserve good quality without creating an unnecessarily large file.

SettingRecommended choiceWhy it helps
Canvas ratio9:16Fills a vertical phone screen
Resolution1080 × 1920Standard Full HD vertical output
Frame rate30 FPSSuitable for most recorded and talking-head videos
Higher frame rate60 FPS only when the source is 60 FPSHelps motion remain smooth without inventing extra detail
Export qualityHighReduces avoidable compression before upload
File formatMP4Widely compatible with mobile and social apps
Text placementInside the central safe areaHelps prevent interface buttons and captions from covering words

Instagram accepts more than one video shape, but 9:16 is the practical choice for a full-screen Reel. The platform’s published Reel requirements include a minimum frame rate of 30 FPS and a minimum resolution of 720 pixels. Its Reel size and aspect-ratio help page contains the latest platform requirements.

Best InShot export settings for Instagram Reels including 916, 1080p and 30 FPS

Should you export a Reel in 4K?

InShot can support 4K and 60 FPS export on compatible devices, according to its official app listings. That does not mean every Reel needs those settings.

For most Instagram content, 1080 × 1920 is the better balance. It exports faster, takes less storage, and is easier to upload. A 4K export cannot restore detail that was absent from the original recording. Instagram may also compress the uploaded file.

Use 4K only when your original footage is genuinely 4K and you have a clear reason to preserve the larger master file. You can keep that master separately and upload a 1080p version to Instagram.

Should you choose 30 FPS or 60 FPS?

Match the export to the way you recorded the clips.

  • Export at 30 FPS when most source footage was recorded at 30 FPS.
  • Consider 60 FPS for sport, fast movement, or slow-motion footage recorded at 60 FPS.
  • Do not export a 30 FPS recording at 60 FPS simply because the number is higher. It increases the file size without creating genuine new motion detail.

How to Create an Instagram Reel in InShot: Step by Step

The names and positions of controls can change slightly between Android, iPhone, and app updates. The editing process remains broadly the same.

Step 1: Plan the Reel before opening InShot

Choose one topic and one main action you want the viewer to take. The action might be saving the post, following your account, visiting a link, commenting, or trying the tip.

A simple Reel structure is:

  1. Hook: State the problem or show the result.
  2. Value: Demonstrate the steps, evidence, or transformation.
  3. Payoff: Reveal the final result or summary.
  4. Call to action: Tell the viewer what to do next.

You do not need a full screenplay. A few lines in your notes app are enough.

Step 2: Record clips vertically

Hold the phone upright and use the rear camera when practical. Record in a quiet place if speech matters. Face a window or another soft light source. Avoid placing a bright window directly behind the subject unless you want a silhouette.

Record several short takes instead of one very long clip. Short clips are easier to arrange and replace. Leave brief pauses between sentences if you plan to cut a talking-head video.

Step 3: Start a new video project

Open InShot and tap Video, followed by New or the new-project control. Allow access only to the photos and videos required for the project when your phone offers that option.

Select the source clips in the order you want to use them. You can change the order later. Tap the confirmation mark to open the timeline.

Step 4: Set the canvas to 9:16

Open Canvas, Ratio, or the equivalent aspect-ratio tool. Select 9:16.

If a horizontal clip does not fill the frame, choose one of these approaches:

  • Enlarge and crop it to fill the vertical canvas.
  • Keep the complete clip and add a blurred or coloured background.
  • Place the clip in a designed layout with text above or below it.
  • Use picture-in-picture to combine it with another vertical visual.

Do not stretch the video. Stretching changes the subject’s natural proportions.

Step 5: Arrange the clips

Press and hold a clip in the timeline, then drag it to a new position. Put the strongest visual or sentence first.

Watch the rough sequence without adding effects. Ask three questions:

  • Does the subject become clear immediately?
  • Does every clip help the story?
  • Can any section be shorter?

Remove repetition before polishing the project.

Step 6: Trim, split, and delete unwanted footage

Select a clip and drag its ends inward to remove dead time. Use Split when you need to cut in the middle of a clip.

A clean cutting process is:

  1. Move the playhead to the start of the unwanted section.
  2. Tap Split.
  3. Move the playhead to the end of that section.
  4. Tap Split again.
  5. Select the separated piece and tap Delete.

For spoken videos, cut long breaths and empty pauses, but keep the result natural. If every gap is removed, the voice can sound rushed.

Step 7: Crop and straighten each shot

Check that the main subject remains visible after changing to a vertical canvas. Reposition each clip when needed. Keep faces, products, and important actions away from the extreme edges.

Instagram places interface elements over a Reel. These can include the account name, caption preview, audio information, and action buttons. Keep important words and graphics in the central part of the frame. Preview the cover separately because the profile grid may crop it differently.

Step 8: Adjust speed when it improves the story

Use Speed to shorten repetitive actions, create a time-lapse feel, or slow down a key moment. InShot’s current listings describe standard speed control and speed-ramping tools.

Useful examples include:

  • Speed up a long packing, drawing, cooking, or setup process.
  • Slow down the final reveal.
  • Use a gentle speed curve to connect movement with a music beat.

Avoid changing the speed of speech unless the result still sounds natural. Major speed changes can also affect audio timing.

Step 9: Add transitions sparingly

Tap the transition control between two clips. A simple dissolve, fade, or movement transition can smooth a change in time or location.

Most cuts do not need a special transition. Straight cuts often feel faster and cleaner. Reserve noticeable effects for a deliberate transformation, beat change, or scene shift. Keeping transitions consistent also makes the Reel look more professional.

Step 10: Add music, sound effects, or a voice-over

Open Music or Audio. Depending on your version, you may be able to choose an InShot track, import permitted music, extract audio from a video, add a sound effect, or record a voice-over.

Set speech first. Then lower the background music until every word is easy to understand. Check the video with earphones and through the phone speaker because the mix can sound different on each.

For a voice-over, finish the main cuts before recording. If you record first and later remove several video sections, the narration may no longer match the pictures.

Step 11: Add text and captions

Use Text for the hook, short labels, and the final call to action. Use Captions or Auto Captions when it is available and you want spoken words transcribed. InShot’s official website says its Auto Captions tool can generate and edit captions in multiple languages.

Keep captions easy to scan:

  • Use a large, simple font.
  • Choose strong contrast between the text and background.
  • Limit each text block to a few words or a short sentence.
  • Break long speech into smaller caption groups.
  • Keep text away from the bottom and right edges.
  • Use the same font and colours throughout the Reel.
  • Proofread every automatic caption before exporting.

Automatic transcription can misread names, brand terms, accents, and mixed-language speech. Review Hindi-English or other multilingual captions especially carefully.

Step 12: Improve colour and brightness

Open Filter and then use Adjust or similar manual controls. Correct exposure, contrast, saturation, warmth, highlights, and shadows with small changes.

Try to make neighbouring clips feel consistent. A bright clip followed by a very dark clip can distract the viewer. Avoid pushing saturation and sharpness so far that skin, food, or products look unnatural.

Step 13: Add optional layers and movement

Once the basic edit works, consider one advanced tool:

  • Use Picture-in-Picture to show a screen recording above a talking-head clip.
  • Use Keyframes to move or resize a label over time.
  • Use Tracking to make text follow an object.
  • Use Chroma Key for properly recorded green-screen footage.
  • Use Background Removal to separate a subject from a simple background.
  • Use Stabilise when a handheld clip has distracting movement and the feature is available.

These tools should support the message. Too many moving layers can make a short Reel difficult to follow.

Step 14: Build a strong ending

End as soon as the promise is fulfilled. Then add one short call to action.

Examples include:

  • “Save this for your next edit.”
  • “Which step will you try first?”
  • “Follow for more mobile editing tips.”
  • “See the full tool guide on Digital Discite.”

Do not stack several requests in the same ending. One clear action is easier to understand.

Step 15: Preview the complete Reel

Watch the entire video at least twice.

During the first pass, focus on the story and pacing. During the second, check technical details:

  • Spelling and caption timing
  • Text placement
  • Music and voice levels
  • Accidental blank frames
  • Abrupt cuts
  • Repeated clips
  • Colour differences
  • The first and final frame

Also watch once with the sound muted. The main idea should still be understandable from the visuals and captions.

Step 16: Export from InShot

Tap Save or the export icon. Choose:

  • Resolution: 1080p
  • Frame rate: 30 FPS for most projects
  • Quality: High
  • Format: MP4, when a format option appears

Choose 60 FPS only when the original footage and the project genuinely benefit from it. Keep InShot open during export. Avoid locking the phone or switching between demanding apps until the file is saved.

Play the exported video from your gallery before uploading it. This confirms that the file, sound, captions, and timing are correct.

Step 17: Upload the video to Instagram

Open Instagram, create a new Reel, and select the exported video. Then:

  1. Check the crop and full-screen preview.
  2. Add licensed Instagram audio if you intentionally left music out of InShot.
  3. Choose a clear cover image.
  4. Write a useful caption with the main topic near the beginning.
  5. Add relevant tags, a location, or a collaborator only when they genuinely apply.
  6. Add alt text or accessibility information if Instagram presents the option.
  7. Turn on Upload at highest quality in Instagram’s media-quality settings.
  8. Review the final preview and publish.

Instagram changes its menus and Reel length options over time. Check the current composer on your account instead of trimming a finished project to an old limit found in another tutorial.

Five-step workflow for creating an Instagram Reel in InShot

How to Create an Instagram Reel from Photos in InShot

You do not need video clips to make a Reel. InShot can turn a set of photos into a vertical slideshow.

Step-by-step photo Reel workflow

  1. Open Video and start a new project.
  2. Select the photos in the required order.
  3. Set the canvas to 9:16.
  4. Adjust how long each image remains on screen.
  5. Crop or reposition each photo for the vertical frame.
  6. Add subtle transitions between images.
  7. Add short labels or captions.
  8. Add music or leave space for Instagram audio.
  9. Preview the pacing.
  10. Export at 1080p and 30 FPS.

Match photo changes to the rhythm when using music. Do not make every image change too quickly. Viewers need enough time to understand faces, text, and details.

For before-and-after content, hold the “before” image long enough to register. Then use a clean cut, swipe, or reveal to show the result.

There are two sensible workflows.

Option 1: Add audio inside InShot

Use this method when you own the audio, have a suitable licence, or use music made available for that purpose inside InShot. It gives you precise control over cuts and beat timing.

Option 2: Add the audio inside Instagram

This is often the easier approach for a currently trending Reel sound.

  1. Edit the visuals in InShot.
  2. Keep the original voice or export without background music.
  3. Upload the video to Instagram.
  4. Choose the sound from Instagram’s available audio library.
  5. Select the relevant section.
  6. Lower the music if the Reel contains speech.

Audio availability and permitted uses can vary by country, account type, and rights agreement. Business accounts may see a different music selection. For commercial content, use music you created, properly licensed material, or audio that your account is permitted to use. Do not download another creator’s Reel simply to extract copyrighted music.

Best Editing Style for Different Types of Reels

Reel typeUseful InShot toolsEditing approach
Talking-head tipSplit, captions, PIP, voice enhanceRemove empty pauses, add readable captions, and show examples above the speaker
Product demonstrationTrim, speed, text, keyframesStart with the result, show close-ups, and label the main benefit
TutorialText, screen recording, PIP, voice-overPresent one step at a time and keep labels consistent
Travel montageMusic, colour adjustment, speed ramp, transitionsUse varied shots and cut to rhythm without overusing effects
Before and afterSplit, transition, freeze frameMake the contrast obvious and hold both states long enough to compare
Photo slideshowCanvas, duration, transitions, musicUse 9:16, maintain a steady pace, and avoid excessive zoom movement
Customer testimonialTrim, captions, logo or text overlayKeep the speaker natural and highlight only the strongest sentence

Useful Advanced InShot Tools for Reels

Auto Captions

Automatic captions save time and improve accessibility. They also help people understand a Reel when their sound is off. Always correct transcription errors and punctuation manually.

Keyframes

A keyframe stores an element’s position, size, rotation, or another property at a particular moment. Add one keyframe, move forward in the timeline, and change the element. InShot creates movement between the two states.

Use keyframes for a gentle zoom, a moving arrow, or a label that follows the subject. Keep the movement smooth and purposeful.

Picture-in-Picture

PIP places one image or video above another. It is useful for reactions, demonstrations, comparisons, screen recordings, and before-and-after layouts.

Chroma Key

Chroma key removes a selected colour, usually a green background. The result is best when the original background has even light and the subject is not wearing the same colour.

Speed Curve

Speed curves let a clip accelerate and slow down within the same shot. They work well for movement, reveals, and beat-based edits. Apply them sparingly so viewers can still understand the action.

InShot Free vs InShot Pro

You can complete many basic Reel edits with the free version. Paid features and available offers can vary by device, country, and app version.

AreaFree versionInShot Pro
Basic cutting and arrangingAvailableAvailable
Text, music, and basic effectsMany options availableFull paid library included
AdvertisingMay appearRemoved
WatermarkMay appear; legitimate removal options can varyRemoved automatically according to the App Store listing
Premium filters, transitions, and assetsSome are lockedIncluded while entitlement is active
Best forOccasional creators and beginnersFrequent creators who need the full library and faster workflow

Do not rely on an old price mentioned in a blog post. Open the purchase screen on your device to see the current local price, billing period, trial terms, and cancellation details.

If the free version offers a legitimate in-app option to remove its watermark for a project, follow that prompt. Do not use third-party watermark-removal sites or crop away important parts of the vertical frame.

How to Keep Instagram Reels from Looking Blurry

Start with clean source footage

Export settings cannot repair severe blur, poor focus, digital zoom, or weak lighting. Use the highest practical camera quality and avoid sending clips through messaging apps before editing because those apps may compress them.

Use the correct vertical canvas

A 9:16 project at 1080 × 1920 avoids unnecessary resizing and black bars. Recheck every horizontal clip after setting the canvas.

Avoid repeated exports

Each compression cycle can reduce quality. Edit from the original clips and export the final project once. Do not export, re-import, edit, and export again unless necessary.

Match the frame rate

Keep 30 FPS footage at 30 FPS. Preserve 60 FPS only when the source and the intended motion justify it.

Select high export quality

Choose the high-quality option in InShot. Then watch the saved file in your gallery. If it already looks blurry there, the issue happened before Instagram received it.

Enable Instagram’s highest-quality upload setting

In Instagram, open the settings area for media quality and enable Upload at highest quality. The exact menu path can change between app versions.

Use a reliable connection

Upload over a stable network and keep Instagram active until the upload completes. Give the platform time to finish processing before judging the final quality.

Common InShot Reel Mistakes to Avoid

Using a long introduction

Start with the result or benefit. A title card that delays the useful content can lose attention.

Placing text under Instagram controls

Keep important words away from the top, bottom, and right edges. Check the Reel preview before publishing.

Adding too many effects

Transitions, stickers, zooms, and animated text compete for attention. Choose a small visual system and repeat it.

Making captions too small

Your video will be viewed on phones of different sizes. Large text and strong contrast are safer than decorative fonts.

Letting music cover the voice

Reduce music during speech. Listen through both earphones and the phone speaker.

Using copyrighted audio without permission

A song being easy to find online does not mean it is cleared for your use. Use licensed audio and follow the rules that apply to your account and content.

Exporting at the wrong ratio

A square or horizontal project can leave borders or require aggressive cropping. Set 9:16 near the start of the edit.

Exporting 30 FPS footage at 60 FPS

This makes a larger file but does not create the missing motion information.

Deleting the project too soon

Keep the InShot draft and original clips until the Reel has uploaded correctly. A project may depend on media stored on your phone, so moving or deleting source files can cause problems.

Troubleshooting InShot and Instagram Reel Problems

The Reel has black bars

Open the project and confirm that the canvas is 9:16. Enlarge the clip, use a blurred background, or redesign the frame. Do not stretch it.

Instagram crops the text

Move captions and labels toward the centre. Also check the cover separately because the grid preview and full Reel can show different crops.

The export is blurry

Check the original footage, canvas size, and export resolution. Export at 1080p with high quality. Avoid enlarging a low-resolution clip.

The audio is out of sync

Return to the last point where the audio matched. Lock the picture edit before recording the final voice-over. Check whether a speed change or deleted video section shifted the sound.

Export stops or the app closes

Free storage, close other demanding apps, restart the phone, and try again. A project with many effects, PIP layers, high-resolution clips, or a high frame rate needs more memory and processing power.

The watermark appears

Use only the removal choices presented by InShot, or use InShot Pro if it makes sense for your workflow. The App Store listing says Pro removes the watermark and advertisements automatically.

Confirm that Instagram’s highest-quality upload option is enabled. Upload the original InShot export rather than a copy sent through a messaging app. Use a stable connection and wait for processing to finish.

Is InShot Safe to Use?

Install InShot only from its official website link or your device’s recognised app store. Review the permissions before granting access. When your phone allows selected-media access, share only the clips needed for the project.

App privacy practices and disclosures can change. The current Google Play listing includes a Data Safety section, while Apple’s listing includes App Privacy information. Review those store disclosures and InShot’s privacy policy before using personal, client, or confidential footage.

InShot Video Editor: Pros and Limitations

Advantages

  • Easy to learn on a phone
  • Strong tools for short vertical content
  • Quick trimming, text, audio, and caption workflow
  • Advanced options such as PIP, keyframes, tracking, and chroma key
  • Custom output settings, including high-resolution export on compatible devices
  • Suitable for both videos and photo Reels

Limitations

  • Ads and locked assets can interrupt the free workflow
  • Free exports may include branding depending on the version or option selected
  • Complex projects can be harder to manage on a small screen
  • Long projects and many layers can strain older phones
  • Features and menu names can differ by operating system and update
  • Instagram still compresses uploaded video

Frequently Asked Questions

Is InShot Video Editor free?

InShot can be downloaded and used for many basic edits at no initial cost. It also contains advertisements, in-app purchases, and Pro plans. The exact free tools and purchase offers can vary by platform and region.

Can I create an Instagram Reel in InShot?

Yes. Create a video project, use a 9:16 canvas, edit the footage, export it to your gallery, and upload the saved file as a Reel in Instagram.

What InShot ratio should I use for Instagram Reels?

Use 9:16 for a full-screen vertical Reel.

What resolution is best for Instagram Reels?

1080 × 1920 is a practical standard for vertical Full HD Reels. It offers good detail without the file size of 4K.

Should I export an Instagram Reel at 30 or 60 FPS?

Use 30 FPS for most projects and footage recorded at 30 FPS. Use 60 FPS when the source was recorded at 60 FPS and smooth motion is important.

Can InShot add automatic captions?

Yes, current InShot materials list Auto Captions. Availability can depend on the device, app version, language, region, or plan. Always proofread the generated text.

Can I make a Reel from photos?

Yes. Import photos into a video project, set the duration of each image, add transitions and audio, and export the slideshow as a vertical video.

For a sound that is currently available in Instagram, editing the visuals in InShot and adding the audio during Instagram upload is often simpler. Use only audio that you are allowed to use.

How do I remove the InShot watermark?

Use a legitimate removal option shown inside the app, when available, or choose a Pro plan. InShot’s Apple listing states that Pro removes watermarks and ads automatically.

Why does my Reel look blurry after upload?

Common causes include low-quality source clips, the wrong canvas size, repeated compression, a low export setting, and Instagram upload compression. Export at 1080p with high quality and enable Instagram’s highest-quality upload option.

Does InShot post directly to Instagram?

InShot can provide sharing options, but it remains a separate app. Saving the finished video to your gallery before uploading gives you a backup and lets you review the exact exported file.

How long should an Instagram Reel be?

Use the shortest length that explains the idea properly. Instagram changes upload limits and options over time, and they can vary by account or upload route. Check the current Reel composer before finalising a longer project.

Final Verdict

InShot Video Editor is a practical choice for people who want to create Instagram Reels entirely on a phone. Its basic timeline is approachable, while captions, PIP, keyframes, tracking, speed controls, and other tools leave room to create more advanced edits.

The best results still come from simple decisions. Record clear vertical footage. Start with a strong hook. Remove anything that does not help the story. Keep captions readable. Balance the audio. Export at 1080 × 1920 and 30 FPS for most projects. Then review the final file and upload it with Instagram’s highest-quality setting enabled.

For more useful websites and apps, explore our guide to the best tech tools. If you are preparing a custom Reel cover, use our image SEO optimization guide to name, compress, and describe the image correctly before publishing it on your website.

Disclosure: InShot and Instagram are trademarks of their respective owners. Digital Discite is not affiliated with InShot or Meta. Features, pricing, interface labels, and platform requirements can change; verify important details in the current app before publishing.

InShot Video Editor: How to Create Instagram Reels Read More »

Top AI Video Tools for Creators in 2025

1. Introduction

Video content continues to dominate the digital world in 2025. Platforms like YouTube, TikTok, Instagram Reels, and video ads are driving more engagement, reach, and conversions than any other content format. For creators, video is no longer optional—it’s essential.

However, creating high-quality videos comes with challenges. Many creators struggle with time constraints, limited editing skills, expensive software, and high production costs. Traditional video editing often requires hours of work and technical expertise, slowing down content output.

This is where AI video tools for creators are changing the game. These tools automate complex editing tasks, simplify production, and speed up workflows—allowing creators to focus more on ideas and storytelling instead of technical work.

Preview: This guide explores the top AI video tools for creators that help produce professional-quality videos faster and more efficiently in 2025.

2. Why Creators Are Using AI Video Tools

Creators are increasingly turning to AI video tools for creators because they remove many barriers to video production.

One major advantage is speed. AI automates tasks like cutting clips, adding captions, generating visuals, and syncing audio, significantly reducing editing time. What once took hours can now be done in minutes.

AI tools also lower production costs. Instead of hiring editors or purchasing expensive software, creators can rely on affordable or free AI solutions to produce high-quality videos.

Another key benefit is accessibility. These tools require little to no advanced editing knowledge. Features like text-to-video, auto-captions, smart transitions, and AI voiceovers make video creation easy for beginners.

Finally, AI helps maintain content consistency. By using templates, presets, and automation, creators can publish more frequently while maintaining a professional look and feel.

3. Types of AI Video Tools

There are different categories of AI video tools for creators, each serving a specific purpose:

  • Text-to-video and script-to-video tools that convert written content into videos
  • AI video editors that auto-cut footage, remove silences, and enhance visuals
  • AI avatar and presenter tools for faceless or professional videos
  • Captioning and subtitle generators for accessibility and engagement
  • AI video enhancement tools that improve quality, resolution, and lighting

Using the right combination of tools creates a smoother and more efficient video workflow.

4. Top AI Video Tools for Creators in 2025

1. Runway

Runway offers powerful AI features such as background removal, video generation, and smart editing tools.
Best for: Creators, filmmakers, and content teams
It’s ideal for creators who want advanced creative control with AI assistance.

2. Pictory

Pictory turns scripts or blog posts into videos automatically, making it perfect for content repurposing.
Best for: YouTubers, bloggers, and digital marketers
It helps transform written content into engaging video formats quickly.

3. Synthesia

Synthesia allows creators to produce videos using AI avatars and realistic voiceovers.
Best for: Explainer videos, training content, and presentations
This is one of the most popular AI video tools for creators who prefer face-free content.

4. Descript

Descript enables text-based video and audio editing, allowing creators to edit videos like documents.
Best for: Podcasts, interviews, and talking-head videos
It’s especially useful for cutting mistakes and improving clarity.

5. InVideo AI

InVideo AI helps generate videos using templates, scripts, and automated editing.
Best for: Social media videos, ads, and marketing content
It’s beginner-friendly and optimized for fast production.

6. CapCut AI

CapCut AI offers auto-captions, smart effects, and trend-based templates.
Best for: TikTok, YouTube Shorts, and Instagram Reels
This tool is highly popular among short-form video creators.

7. VEED.io

VEED.io is an online editor with AI subtitles, effects, and quick editing tools.
Best for: Fast edits and social media content
It’s perfect for creators who want speed without complexity.

5. How to Choose the Right AI Video Tool

Choosing the right AI video tools for creators depends on your content goals. Short-form creators should focus on tools like CapCut or VEED, while long-form or educational creators may prefer Descript or Synthesia.

Consider your primary platform—YouTube, TikTok, Instagram, or ads—and choose tools optimized for those formats. Also, balance free vs paid plans based on your budget and export needs.

Ease of use, output quality, and branding options should always be top priorities.

6. Tips to Get the Best Results from AI Video Tools

To maximize results, always start with a clear script or content idea. AI performs best when given structured input.

Customize AI-generated content to keep your videos original and authentic. Avoid publishing raw AI output without adjustments.

Many creators combine multiple AI video tools for creators—for example, using one tool for editing and another for captions or avatars.

Finally, stay updated as AI tools evolve rapidly with new features.

7. Common Mistakes to Avoid

One common mistake is overusing AI effects without focusing on storytelling. AI should enhance creativity, not replace it.

Another issue is ignoring branding consistency, such as colors, fonts, and tone.

Relying entirely on AI without human input can also make content feel generic. Creative direction is still essential.

8. Conclusion

In 2025, AI video tools for creators are empowering faster, smarter, and more cost-effective content production. They remove technical barriers, improve consistency, and allow creators to scale their output without burnout.

The key is experimentation—test different tools, refine your workflow, and keep creativity at the center.

Call to action: Try one AI video tool for creators today and elevate your content quality and efficiency in 2025

Best Free Design Tools for Beginners in 2025

Top AI Video Tools for Creators in 2025 Read More »

Scroll to Top